
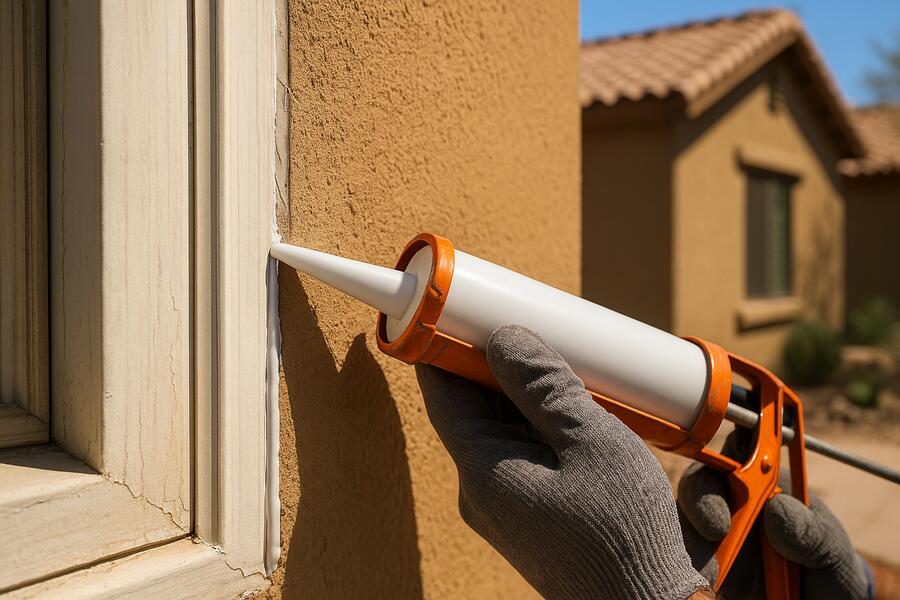
When preparing a home for a fresh coat of paint, many homeowners focus on cleaning and patching. However, there’s a crucial, often overlooked step that dramatically impacts the longevity and aesthetics of your exterior paint job: proper caulking before exterior painting. Skipping this vital preparation can lead to premature paint failure, moisture intrusion, and ultimately, more costly repairs down the line.
At Pro Tech Painting, we emphasize that a superior paint finish begins long before the brush touches the wall. Our experience has shown that meticulous caulking and sealing are fundamental to achieving a durable, weatherproof, and beautiful exterior. This guide will walk you through why this step is so important and how to ensure it’s done right.
💡 Key Takeaway: Proper caulking and sealing are essential pre-painting steps that protect your home from moisture and ensure your exterior paint job lasts longer and looks better. Never skip it!
The Critical Role of Caulking in Exterior Paint Longevity
Why Caulking Is Non-Negotiable for Exterior Paint
Caulk serves as a flexible sealant, filling gaps and cracks where different building materials meet or where movement occurs. On your home’s exterior, these areas are vulnerable points where moisture, insects, and air can penetrate. When you paint over these unsealed gaps, the paint itself often acts as a temporary, brittle seal that will quickly crack and fail, allowing water to seep behind the paint film.
The benefits of proper caulking are extensive:
- Moisture Protection: Seals out rain, humidity, and condensation, preventing water damage, rot, and mold growth in your home’s structure.
- Enhanced Paint Adhesion: Provides a smooth, uniform surface for the paint to adhere to, reducing peeling and cracking.
- Improved Aesthetics: Creates clean, crisp lines around trim, windows, and doors, resulting in a more professional and finished look.
- Energy Efficiency: Seals air leaks, which can help reduce heating and cooling costs.
- Pest Prevention: Blocks entry points for insects and other small pests into your home.
The Golden Rule: Caulk Before the Final Paint Coats
The question “should you caulk before or after painting?” has a clear answer for exterior projects: caulk before your finish paint, but generally after priming any bare wood. The optimal sequence is usually:
- Clean: Thoroughly wash and prepare the surfaces, removing dirt, mildew, and old, loose paint or caulk.
- Repair: Address any major wood rot or structural damage.
- Dry: Ensure all surfaces are completely dry before applying caulk.
- Spot Prime: Prime any bare wood or patched areas where paint has been removed. This provides a uniform surface for the caulk to adhere to.
- Caulk: Apply the appropriate caulk to all necessary gaps and seams.
- Paint: Once the caulk has sufficiently cured (dried), apply your primer (if not spot-primed) and finish coats of paint over the caulk and surrounding surfaces. This ensures the caulk is protected by the paint and seamlessly integrated into the finish.
An exception might be specialized, color-matched silicone sealants used in high-moisture areas, which are sometimes applied after painting and left unpainted. However, for general exterior painting, caulk first, then paint.
💡 Key Takeaway: The ideal painting sequence is clean, repair, spot prime bare wood, caulk, then apply paint. This ensures maximum adhesion and durability for both the caulk and the paint.
Choosing the Right Caulk for Exterior Applications
Not all caulks are created equal. For exterior use, you need products designed to withstand harsh weather, UV radiation, and temperature fluctuations. Key considerations include:
- Paintability: Always confirm the caulk is “paintable” if you intend to cover it with paint. Most acrylic latex or acrylic latex plus silicone formulations are paintable. Pure silicone caulks are generally not paintable and should be used only when a color-matched, unpainted seal is desired.
- Flexibility: Exterior joints experience more movement due to thermal expansion and contraction. Look for caulks with good elasticity to prevent cracking. Acrylic latex with silicone added offers better flexibility than basic acrylic. Polyurethane and hybrid (MS polymer) sealants offer excellent flexibility and durability for more demanding applications.
- Adhesion: Ensure the caulk is compatible with the surfaces you are sealing (e.g., wood, masonry, vinyl, metal).
- Lifespan: High-quality exterior caulks are rated for 30, 40, or even 50+ years. Investing in a better caulk will save you from repeating this step sooner.
For durable exterior painting phoenix az homeowners should always use products specifically formulated for exterior exposure and the local climate.
Where to Caulk and Where to Leave Open for Drainage
Knowing where to caulk is just as important as knowing when. Focus on vertical seams and junctions, but be mindful of drainage points:
- Caulk These Areas:
- Around window and door frames, where the trim meets the siding.
- Vertical seams where two pieces of trim meet.
- Where siding meets corner boards.
- Penetrations for pipes, vents, and utility lines.
- Underneath window sills.
- Do NOT Caulk These Areas (Critical for Drainage):
- The bottom edge of horizontal lap siding. These overlaps are designed to allow any trapped moisture to escape. Sealing them will prevent proper drainage and can lead to rot.
- Weep holes in brick or masonry.
- Anywhere water needs to drain out from behind a surface.
💡 Key Takeaway: Always caulk vertical seams and around openings, but never seal horizontal overlaps on lap siding or weep holes. Proper drainage is crucial to prevent water damage behind your walls.
Allowing Proper Curing Time Before Painting
Once applied, caulk needs adequate time to skin over and cure before it can be painted. Painting over wet or uncured caulk can lead to:
- Cracking: As the caulk dries and shrinks, it can pull the wet paint with it, causing cracks in the paint film.
- Discoloration: Some wet caulks can react with paint components, leading to an uneven or discolored finish.
- Poor Adhesion: The paint may not bond properly to uncured caulk, leading to peeling.
- Shriveling: The paint can shrivel or wrinkle over the caulk bead.
Curing times vary based on caulk type, bead size, temperature, and humidity. Acrylic latex caulks may be paintable in 2-4 hours, while high-performance acrylic latex with silicone or polyurethane may require 6-24 hours. Always check the manufacturer’s instructions on the caulk tube for specific recoat times.
Caulking and sealing are the unsung heroes of a long-lasting exterior paint job. By taking the time to properly prepare your surfaces with the right caulk, you’re not just enhancing the appearance of your home; you’re actively protecting it from the elements for years to come. Don’t let this crucial step be the one homeowners miss.
Have questions about how to best prepare your home’s exterior for painting? Reach out to our team today.
Frequently Asked Questions About Caulking Before Exterior Painting
How long does exterior caulk typically last?
The lifespan of exterior caulk varies widely by type and quality. Basic acrylic latex caulks might last 5-10 years, while high-performance acrylic latex with silicone or polyurethane sealants can last 20-50 years or even longer. Investing in a higher-rated caulk will provide better long-term protection.
What happens if you paint over wet caulk?
Painting over wet or uncured caulk can cause several issues: the paint may crack, wrinkle, blister, or shrivel as the caulk cures and shrinks beneath it. The paint also might not adhere properly, leading to premature peeling or discoloration of the paint film over the caulk line.
Can I use the same caulk for interior and exterior applications?
While some multi-purpose caulks exist, it’s generally best to use caulks specifically formulated for exterior use. Exterior caulks are designed to withstand harsher environmental conditions like UV exposure, extreme temperatures, and moisture, offering greater flexibility and durability than most interior-specific products.
How do I remove old, failing caulk?
Removing old caulk typically involves using a utility knife or a specialized caulk removal tool to score and cut the old caulk, then pulling it away. For stubborn caulk, a heat gun (used carefully) or a chemical caulk remover can help soften it. Ensure the area is clean and dry before applying new caulk.
