
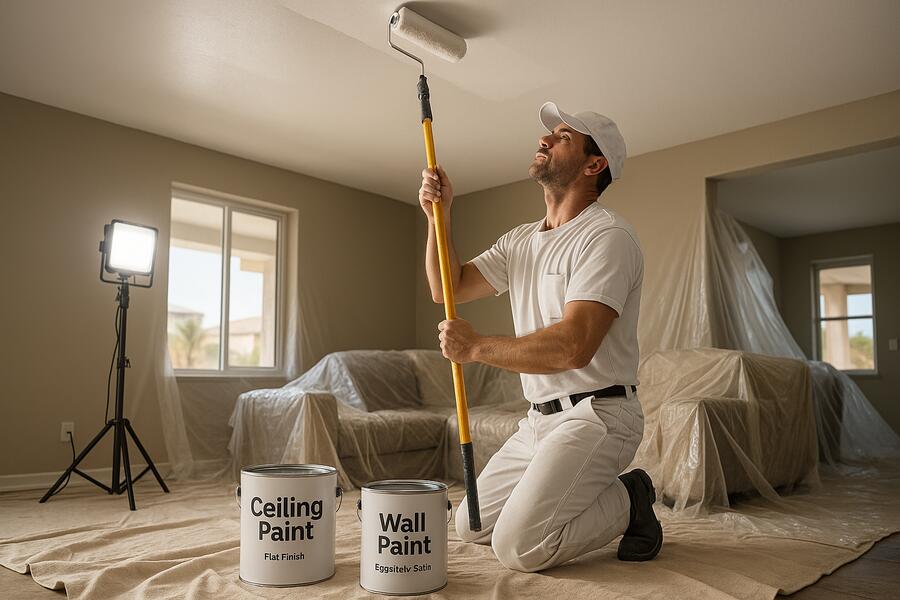
Many homeowners assume that painting a ceiling is just like painting a wall, only overhead. While the basic principles of applying paint remain the same, there are significant differences that make “ceiling painting vs wall painting” a distinct challenge. Ignoring these nuances can lead to frustrating drips, uneven finishes, and a much more strenuous experience. Understanding these differences is key to achieving a professional, smooth, and lasting result for your ceiling.
At Pro Tech Painting, we’ve encountered every type of ceiling and wall scenario imaginable. Our expertise stems from recognizing that each surface requires a tailored approach. This guide will illuminate the specific aspects that set ceiling painting apart, from material choice and application techniques to physical demands and best practices, empowering you to appreciate the precision involved in transforming your overhead space.
💡 Key Takeaway: Ceiling painting differs significantly from wall painting due to paint type, application technique, and physical demands. Recognizing these distinctions is crucial for achieving a professional finish, preventing drips, and ensuring an even appearance.
Distinctive Challenges and Material Choices
1. The Battle Against Gravity: Drips and Splatter
The most immediate and obvious challenge with ceiling painting is gravity:
- Downward Pull: Unlike walls where paint largely stays put, ceiling paint is constantly fighting gravity, making drips and splatters far more prevalent. This necessitates a specific type of paint and careful application.
- Protection is Paramount: Thorough floor and furniture protection (using thick drop cloths and plastic sheeting) is even more critical for ceilings to contain inevitable drips and splatter.
- Minimizing Mess: Professional painters use specific techniques and tools, like roller shields and low-splatter rollers, to control the mess, but some splatter is almost always unavoidable.
2. Specialized Paint Formulations for Ceilings
The paint itself is often different:
- Thicker Viscosity: Ceiling paints are typically formulated with a thicker viscosity than wall paints to reduce drips and splatter.
- Flat Sheen: Most ceiling paints come in a flat (or matte) finish. This is not just for aesthetic preference but also highly functional. A flat finish helps to hide minor imperfections, uneven textures, and poor lighting, which are more noticeable on overhead surfaces. Higher sheens reflect more light, highlighting every flaw.
- Quicker Drying Time: Some ceiling paints are designed to dry faster, which can help prevent lap marks and facilitate quicker recoating, though this also requires faster application from the painter.
💡 Key Takeaway: Ceiling painting’s primary challenge is combating gravity, leading to more drips and splatter, which necessitates superior surface protection. This is addressed with specialized, thicker, flat-sheen ceiling paints designed to minimize drips and hide imperfections more effectively than standard wall paints.
Application Techniques and Physical Demands
3. Unique Application Techniques and Order of Operations
How the paint is applied and the order of painting also differ:
- Rollers and Poles: For walls, a standard roller and tray might suffice. For ceilings, an extension pole is indispensable to reach overhead surfaces comfortably and apply even pressure. A deeper nap roller may be used for textured ceilings.
- Cutting In: Precision is key when “cutting in” (painting the edge where the ceiling meets the wall or crown molding). With ceilings, it’s generally easier to cut in a straight line on the ceiling first, allowing for some overlap onto the wall, and then cut the wall color back up to meet it.
- Top-Down Approach: The universal rule for painting a room is to start from the top down. This means ceilings are always painted first, then walls, then trim. This prevents drips from the ceiling falling onto freshly painted walls or trim.
4. Physical Strain and Visibility
Painting a ceiling is physically much more demanding:
- Arm and Neck Strain: Constantly working overhead strains the neck, shoulders, and arms. This leads to fatigue much faster than painting vertical walls, increasing the likelihood of uneven application or missed spots.
- Lighting Challenges: Overhead surfaces can be challenging to light evenly, making it harder to spot missed areas, lap marks, or imperfections while working. Professionals often use strong, portable work lights directed at the ceiling to ensure thorough coverage.
- A Different Perspective: What looks good from below needs to be applied consistently from an awkward angle. The experience of a professional painter, such as those at Pro Tech Painting, is invaluable here.
| Aspect | Ceiling Painting | Wall Painting |
|---|---|---|
| Gravity Impact | High risk of drips & splatter, requires thicker paint. | Lower risk, paint adheres well to vertical surface. |
| Paint Sheen | Predominantly flat (matte) to hide imperfections. | Varies (eggshell, satin, semi-gloss) based on traffic/preference. |
| Application Tools | Extension poles, specific low-splatter rollers. | Standard rollers, brushes, less reliance on poles. |
| Order of Painting | Always first, before walls and trim. | After ceilings, before trim. |
| Physical Demand | High (neck, shoulder strain), requires frequent breaks. | Moderate, less repetitive overhead work. |
| Visibility of Flaws | More prominent due to lighting angles, hence flat paint. | Less prominent, more forgiving with higher sheens. |
💡 Key Takeaway: Ceiling painting demands specialized application techniques, including the essential use of extension poles and specific cutting-in methods, always performed before walls. It is significantly more physically strenuous, causing arm and neck strain, and presents unique lighting challenges that can hide imperfections, all of which contribute to its distinct difficulty.
The subtle yet significant differences between “ceiling painting vs wall painting” underscore why approaching each with a tailored strategy is essential. From the specific paint formulations designed to defy gravity to the physical dexterity and strategic order of operations required, painting a ceiling is a unique skill. Acknowledging these distinctions ensures that your overhead surfaces receive the attention they deserve, resulting in a beautifully finished room that enhances your entire living space without the frustrating pitfalls of a DIY approach.
Have questions about how to scheduling commercial painting around business hours? Reach out to our team today.
Frequently Asked Questions About Ceiling Painting
Why is flat paint usually recommended for ceilings?
Flat paint is highly recommended for ceilings because its non-reflective finish helps to hide imperfections, minor drywall flaws, and uneven textures. Since ceilings are often lit indirectly or with overhead lighting that can highlight flaws, a flat sheen minimizes glare and shadows, creating a smoother, more uniform appearance. Higher sheens would reflect more light and draw attention to every imperfection.
What is “cutting in” when painting a ceiling, and how is it done?
“Cutting in” refers to using a brush to paint a straight, clean line where two different colors or surfaces meet—in this case, where the ceiling meets the wall or crown molding. For ceilings, a professional typically paints a narrow strip of ceiling paint along the very top edge of the wall, slightly overlapping onto the wall. This allows for a clean line when the wall color is subsequently cut in up to the ceiling paint, ensuring a crisp transition.
Can I use leftover wall paint for my ceiling?
While technically possible, it’s generally not recommended to use leftover wall paint for your ceiling, especially if the wall paint has a higher sheen (like eggshell or satin). Wall paints are typically thinner and more prone to dripping when applied overhead, and their higher sheen will highlight every imperfection on your ceiling. Dedicated flat ceiling paint is formulated to minimize these issues, offering better coverage and less splatter for an overhead application.
What tools are essential for painting a ceiling effectively?
To paint a ceiling effectively, essential tools include: a high-quality extension pole for your roller (to reduce strain and improve reach), a low-splatter roller cover (typically a medium nap for smooth ceilings, or a thicker nap for textured ones), a good angled brush for cutting in, thick drop cloths to protect floors and furniture, painter’s tape (if masking walls/trim), and a sturdy ladder or step stool for detailed brushwork.
