
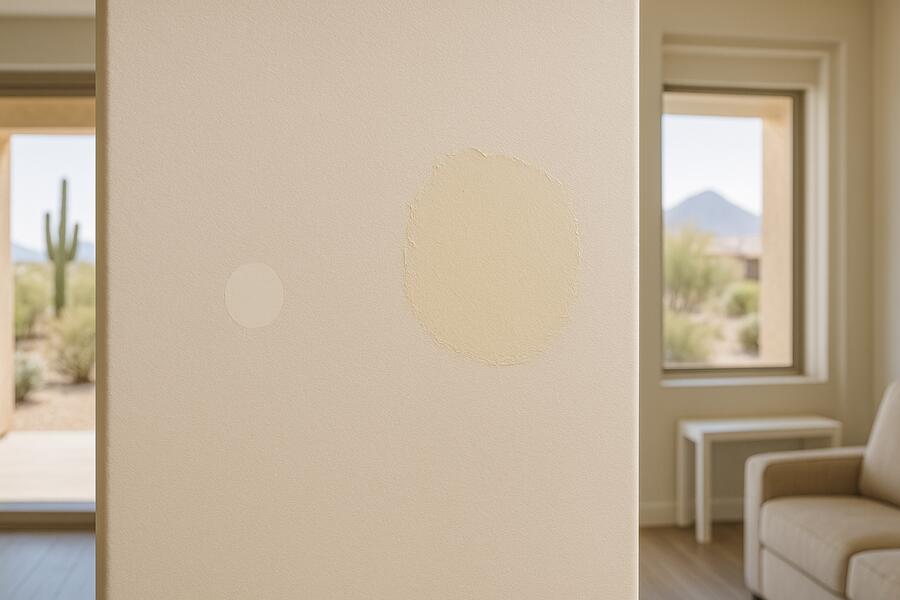
There’s nothing more frustrating than a fresh coat of paint being marred by a scuff, chip, or scratch. Naturally, the first instinct is to grab the leftover paint and perform a quick touch-up. And sometimes, this strategy works perfectly, making the imperfection vanish as if by magic. Other times, however, a touch-up can leave an even more noticeable blotch, drawing attention to the very flaw you tried to hide. Understanding when touch-up paint works and when it doesn’t is key to maintaining your home’s appearance without inadvertently making things worse.
As professional painters, we’ve navigated countless touch-up scenarios. It’s a delicate art that hinges on several critical factors, from the age of the existing paint to the application method. Let’s dive into the scenarios where touch-ups are your friend, and when it might be time to consider a more comprehensive solution.
When Touch-Up Paint Is Your Best Friend
Touch-ups are highly effective for minor, localized damage on relatively fresh paint. The success largely depends on matching crucial variables.
Small, Superficial Imperfections
Touch-ups are ideal for:
- Minor Scuffs or Scratches: If a piece of furniture grazed the wall, or a small toy left a mark, a carefully applied touch-up can make it disappear.
- Small Chips or Dings: For areas where a small fleck of paint has come off, especially if the surface underneath is still smooth and intact. Deeper imperfections might require light spackling first, followed by careful sanding.
- Less Than a Dime in Size: Generally, if the damaged area is smaller than a dime, a brush touch-up is feasible. Larger areas quickly become difficult to blend seamlessly.
Matching Paint, Sheen, and Application Method
For a successful touch-up, these three elements must align perfectly with the original paint job:
- Exact Paint Match: Use paint from the same can or, at minimum, the same batch if available. Even subtle differences in color, especially with older paint or different brands, can result in a noticeable patch. Lighter, pastel colors are often more forgiving than darker, deeper hues.
- Matching Sheen: This is perhaps the most critical factor. If the original paint was eggshell, using satin for a touch-up will create an obvious shiny spot. Sheen levels can also subtly change over time as paint ages and cures.
- Same Application Method: If the original wall was rolled, use a small roller (like a “weenie” roller) for the touch-up. If it was brushed, use a brush. Using a brush on a rolled surface, or vice-versa, will create a texture difference that catches the eye.
💡 Key Takeaway: Touch-up paint works best for small, superficial damages on relatively fresh paint, provided you use the exact same color, sheen, and application method as the original job.
When Touch-Up Paint Doesn’t Work (Or Makes It Worse)
Unfortunately, many scenarios make touch-ups ineffective, often leaving an even more prominent mark. This is when touch up paint doesn’t work as intended.
Large Areas or Extensive Damage
If the damaged area is large or widespread, a touch-up will likely look worse than the original flaw.
- Large Scuffs or Patches: Anything larger than a small coin becomes incredibly difficult to blend seamlessly by hand. The new paint will likely create a noticeable “picture frame” effect.
- Widespread Wear and Tear: If a wall has numerous scuffs, faded areas, or general signs of age, individual touch-ups will create a checkerboard appearance. In these cases, a full repaint is necessary for a uniform finish.
Age and Fading of Existing Paint
This is one of the most common reasons why touch-ups fail.
- Significant Fading: Over time, paint, especially on exterior surfaces exposed to UV light, naturally fades and changes color. Even interior paint can yellow or darken slightly due to light exposure and environmental factors. Applying fresh paint to a faded surface, even if it’s from the original can, will result in a color mismatch.
- Dirt and Grime Buildup: Years of accumulated dirt, dust, and grime also contribute to color variation. A clean touch-up on a slightly soiled wall will stand out. For professional residential painting phoenix az, proper surface preparation is always key.
Sheen and Texture Discrepancies
Even if the color is perfect, these subtle differences can ruin a touch-up.
- Sheen Changes with Age: As paint ages, its sheen can mellow or flatten. A fresh, new application might appear glossier in comparison.
- Inconsistent Texture: Applying with a different tool (e.g., brush instead of roller) creates a visible texture difference, especially with matte or flat finishes. Even subtle variations in paint thickness can alter the texture.
- Environmental Factors During Application: Applying touch-up paint in different humidity or temperature conditions than the original application can affect how the paint dries and cures, leading to differences in sheen or finish.
💡 Key Takeaway: Touch-up paint often fails for large areas, significantly faded or dirty surfaces, or when there are unavoidable discrepancies in sheen or texture between the old and new paint.
Tips for Maximizing Touch-Up Success
If you decide to proceed with a touch-up, follow these best practices:
- Clean the Area Thoroughly: Before applying any paint, gently clean the damaged area with a mild soap and water solution, then wipe it completely dry. This removes dirt and grease that could prevent proper adhesion or create a color mismatch.
- Prepare the Surface: For chips or peeling paint, lightly sand the edges with fine-grit sandpaper to smooth them out, then wipe away dust. For deeper imperfections, use a lightweight spackle, sand smooth, and prime if necessary.
- Feather the Edges: When applying the touch-up, use as little paint as possible. Start in the center of the damaged area and “feather” the paint outwards, using a very light hand to blend the edges into the surrounding wall. Don’t create a hard line.
- Use the Right Tool: As mentioned, try to use the same type of applicator (brush or roller) as the original paint job. For small spots, a small artist’s brush can be effective.
- Work in Good Lighting: Ensure you have adequate lighting, preferably natural light, to accurately assess the blend as you work.
- Allow for Full Cure: Remember that paint’s final color and sheen can take several days to fully develop as it cures. Don’t judge the success of a touch-up immediately after application.
| Scenario | Touch-Up Effectiveness | Recommendation |
|---|---|---|
| Small scuff/chip (fresh paint) | High | Proceed with careful touch-up (same paint, sheen, applicator). |
| Large area / widespread damage | Low | Consider repainting the entire wall or room for uniformity. |
| Faded or aged paint | Very Low | A full repaint is almost always the best option for a seamless look. |
| Texture mismatch (different applicator) | Low | If possible, use the original application method; otherwise, a repaint may be required. |
💡 Key Takeaway: For best results, thoroughly clean and prepare the surface, use minimal paint, feather the edges, and allow the touch-up to fully cure before evaluating its success.
Touch-up paint can be a fantastic solution for minor blemishes, saving you time and money. However, it’s not a magic bullet. By understanding the conditions under which it succeeds and, more importantly, when touch up paint doesn’t work, you can avoid common pitfalls and know when to call in the professionals for a flawless finish. Sometimes, a full repaint is the only way to achieve the uniform, refreshed look your walls deserve.
Have questions about when touch-up paint works and when it doesn’t? Reach out to our team today.
Frequently Asked Questions
How can I store leftover paint for touch-ups?
To store leftover paint effectively, seal the can tightly, ideally with a rubber mallet, and wipe the rim clean. Store it upside down in a cool, dry place away from extreme temperatures and direct sunlight. Label the can with the room it was used in, the date, and the specific area (e.g., “living room walls, satin finish”). For smaller amounts, transfer paint to a glass jar with a tight-fitting lid.
Why do light colors touch up better than dark colors?
Lighter or pastel colors tend to be more forgiving for touch-ups because small variations in color, sheen, or texture are less noticeable due to their higher light reflectivity. Darker colors absorb more light, making any inconsistency stand out more prominently, creating a distinct “flash” or patch.
What if I don’t have the original paint?
If you don’t have the original paint, successful touch-ups become much harder. You can try taking a paint chip from an inconspicuous area to a paint store for color matching. However, even with a perfect color match, a sheen mismatch is very likely, especially if the original paint has aged. In many cases, if the original paint isn’t available, a full repaint of the affected wall or room is often the most reliable solution for a seamless finish.
Should I use a brush or a roller for touch-ups?
Ideally, you should use the same type of applicator that was used for the original paint job to ensure matching texture. If the original wall was rolled, use a small mini-roller for touch-ups. If it was brushed, use a brush. For very small spots (pencil eraser size or smaller), a small artist’s brush can be used carefully, feathering the edges to blend.
